Prerequisites
Prerequisites
- An Enkryptify workspace with admin access
- An AWS account with permissions to create IAM roles and policies
- An AWS Amplify app
Permissions
Permissions
Enkryptify connects to your AWS account by assuming an IAM Role that you create. We use temporary credentials from
sts:AssumeRole to manage secrets in AWS Secrets Manager.- Trust relationship:
- Trusted entity: AWS Account
676206939822(Enkryptify) - External ID: not required (will be added in a future update)
- Trusted entity: AWS Account
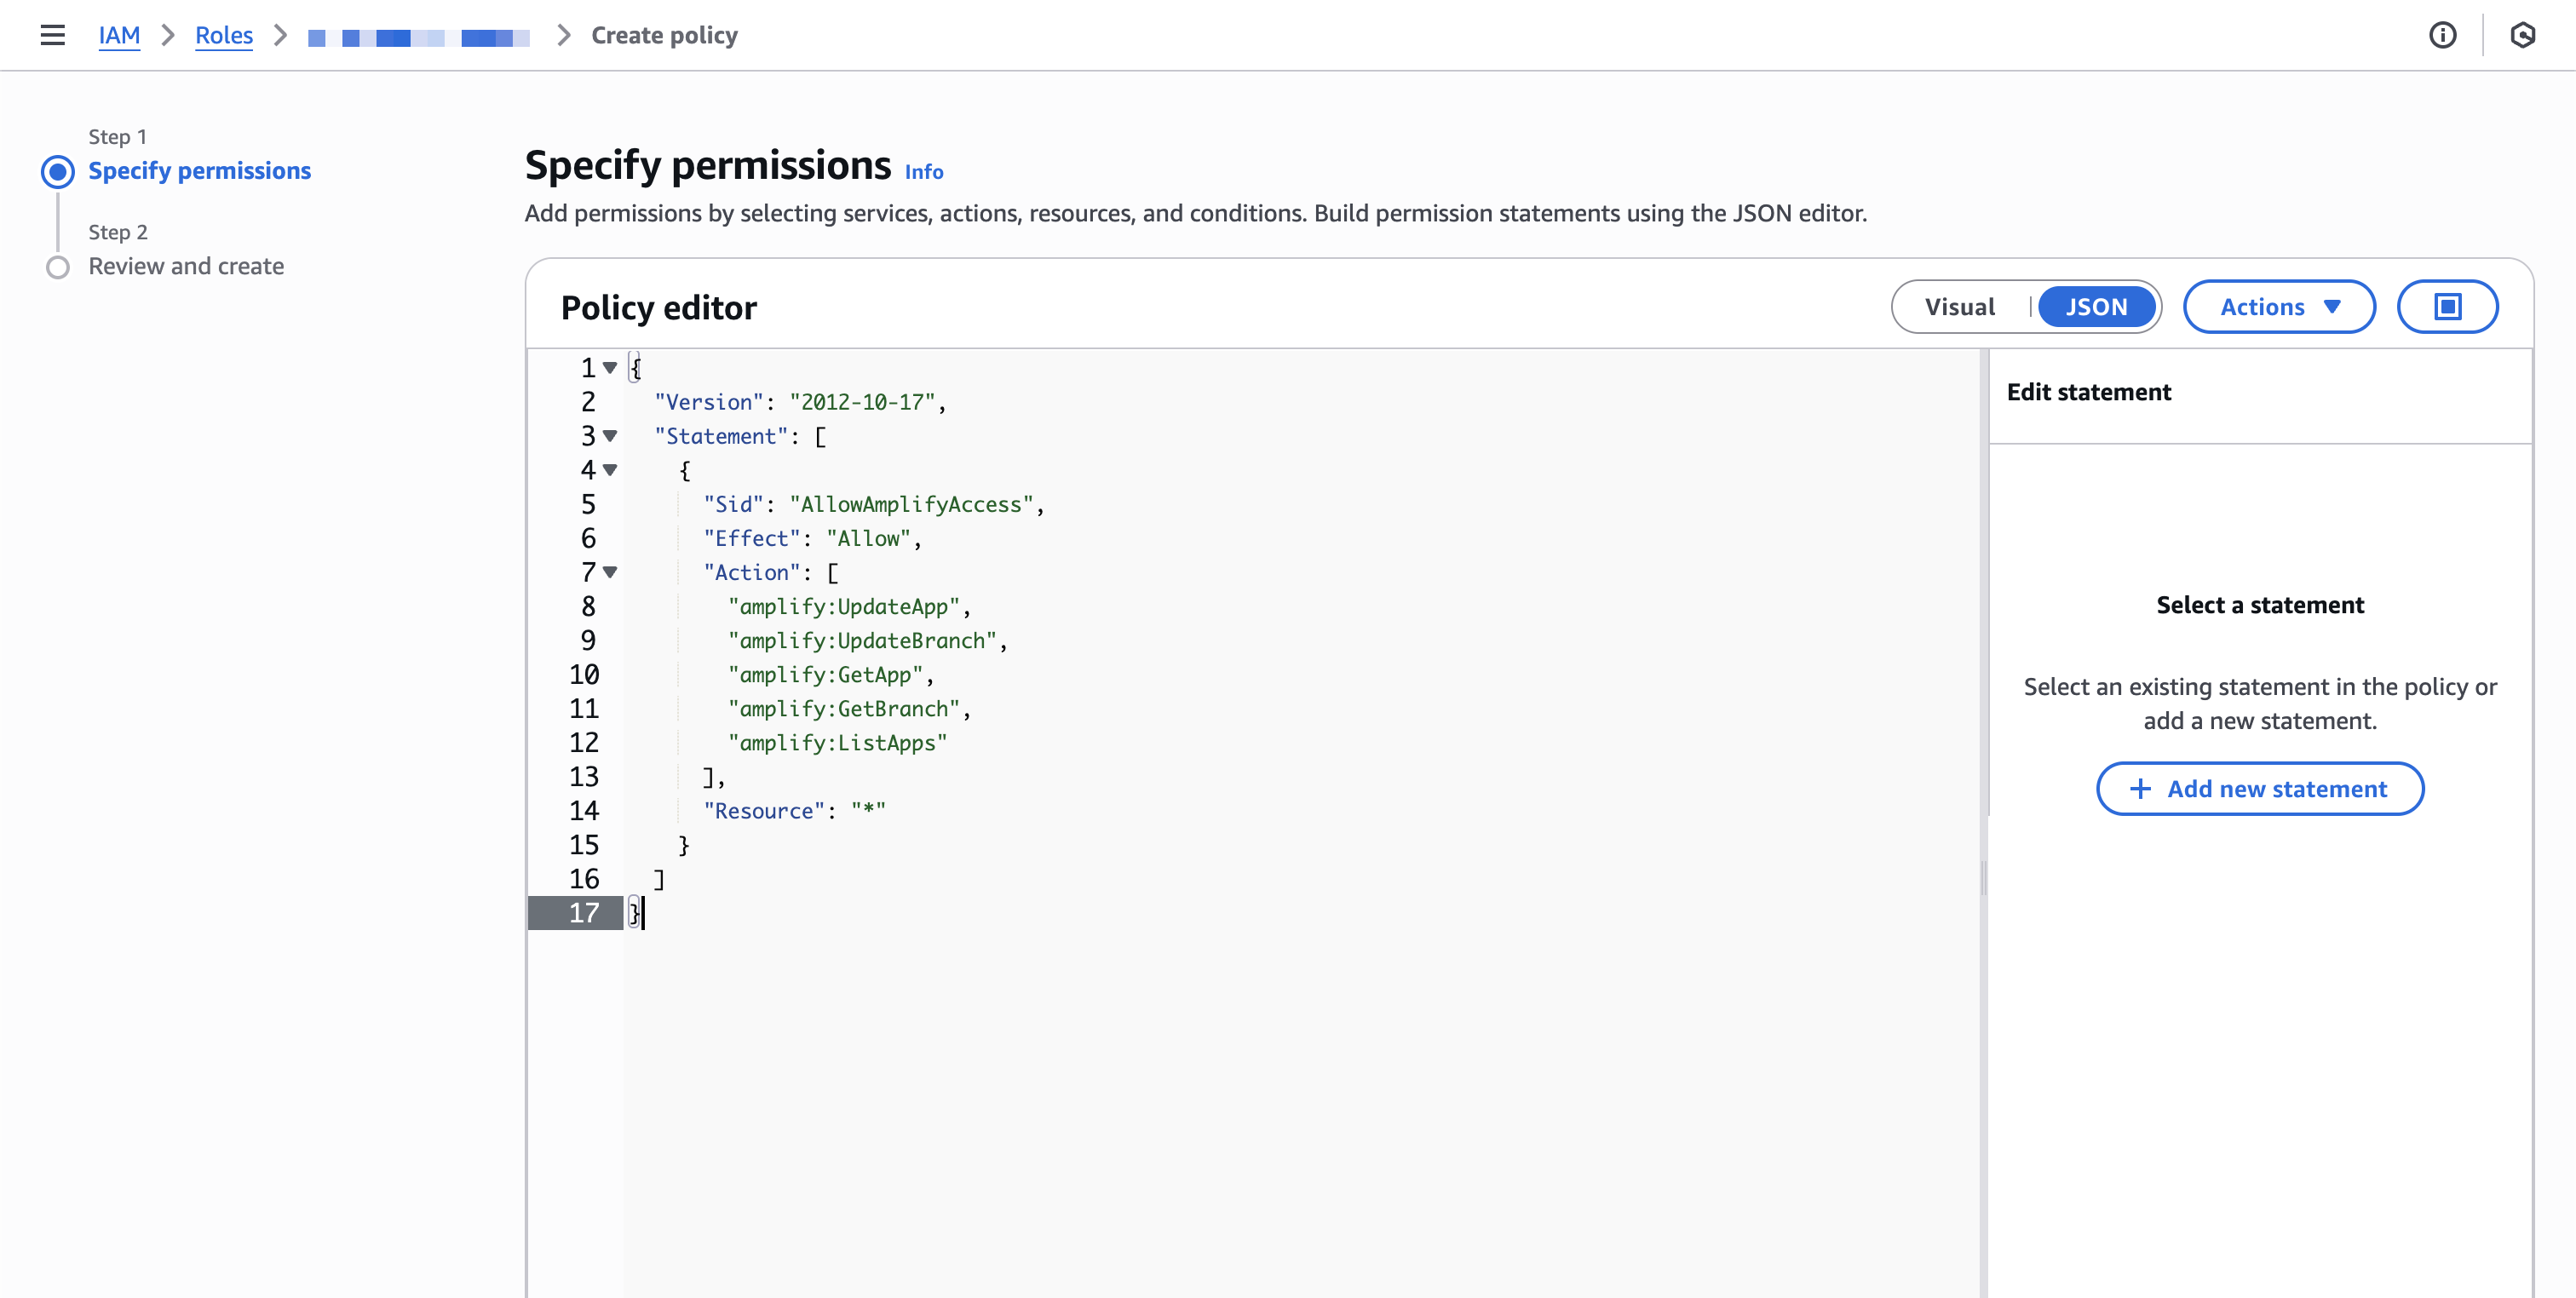
- Required permissions on the assumed role (inline policy example below):
amplify:UpdateAppamplify:UpdateBranchamplify:GetAppamplify:GetBranchamplify:ListApps
You may scope theResourceto specific secret ARNs. The example uses*for simplicity.
Steps to complete
1
Create a new sync
- Go to the
Syncstab of your project and click onAWS Amplify.
2
Start IAM role creation (trust setup)
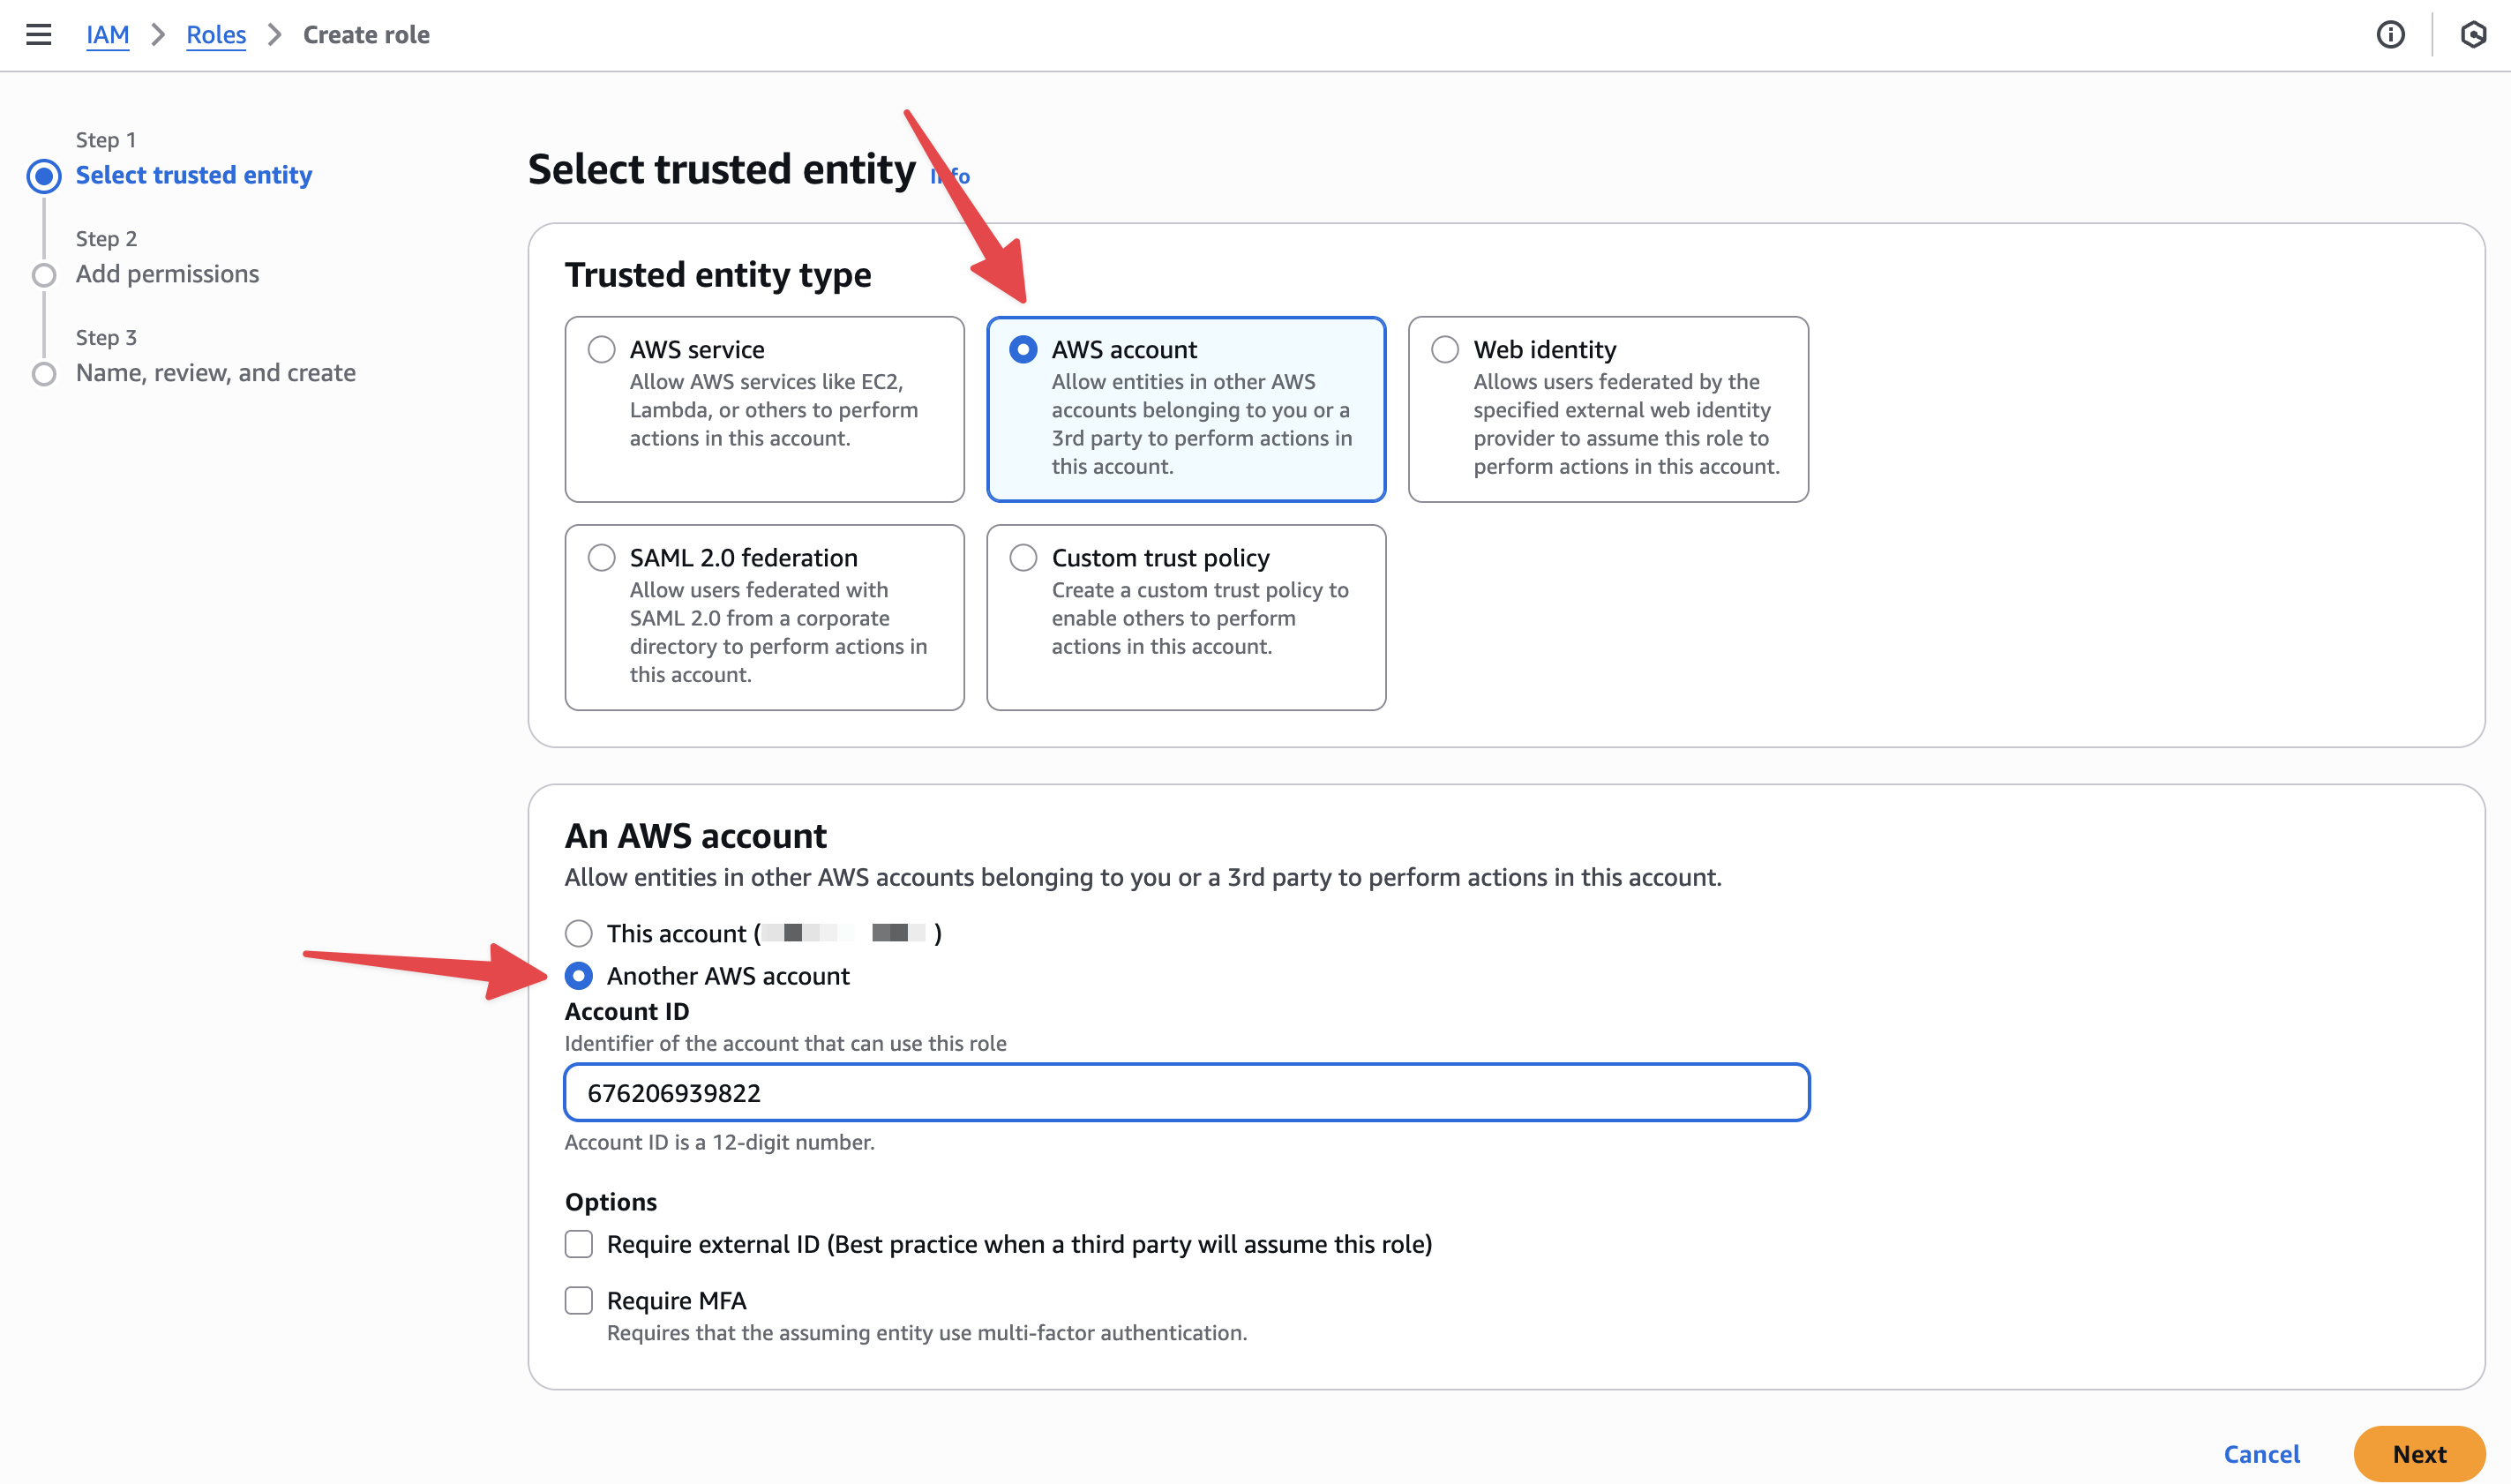
-
In AWS IAM →
Roles→Create role. -
Trusted entity type:
AWS Account→Another AWS Account. -
Enter Account ID
676206939822. -
External ID: not required (will be added in a future update).
3
Finish role creation
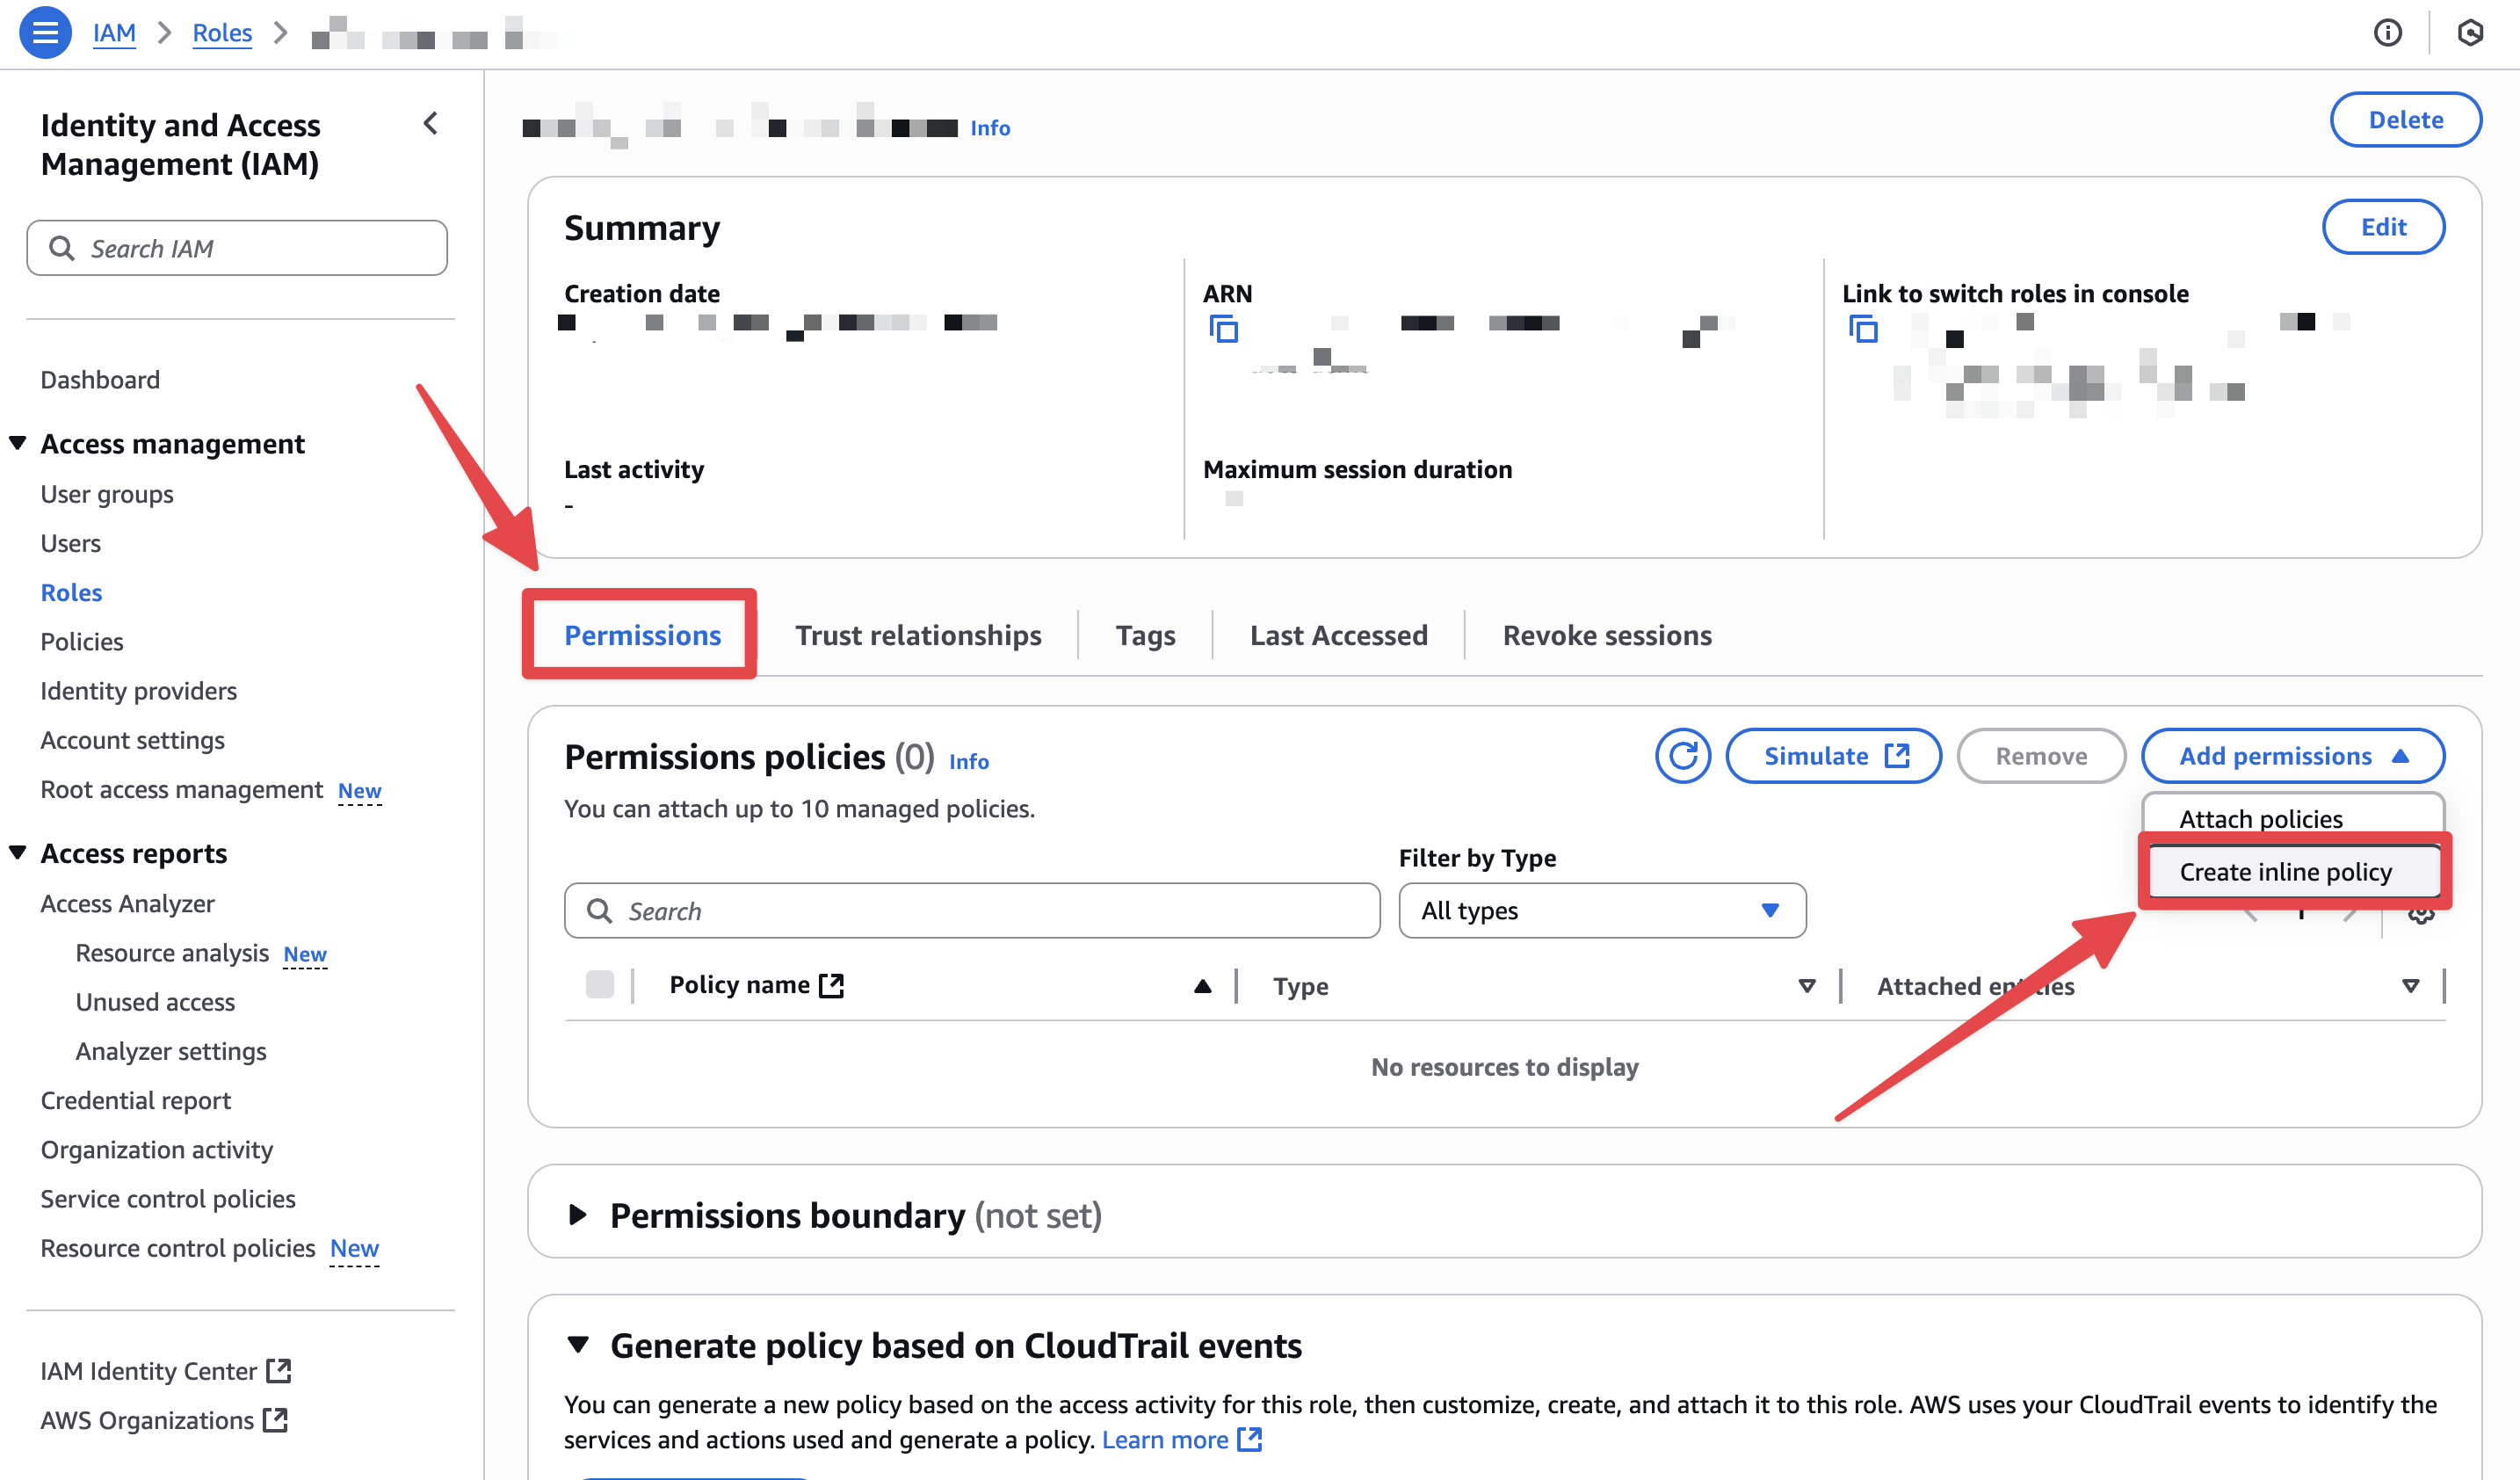
- Skip the ‘Add permissions’ step.
- Provide a role name and finish creation.
4
Attach Secrets Manager permissions
- On the role page, go to
Permissions→Add permissions→Create inline policy→JSON, then paste:
5
Copy the Role ARN
-
From the role’s
Summary, copy theRole ARN.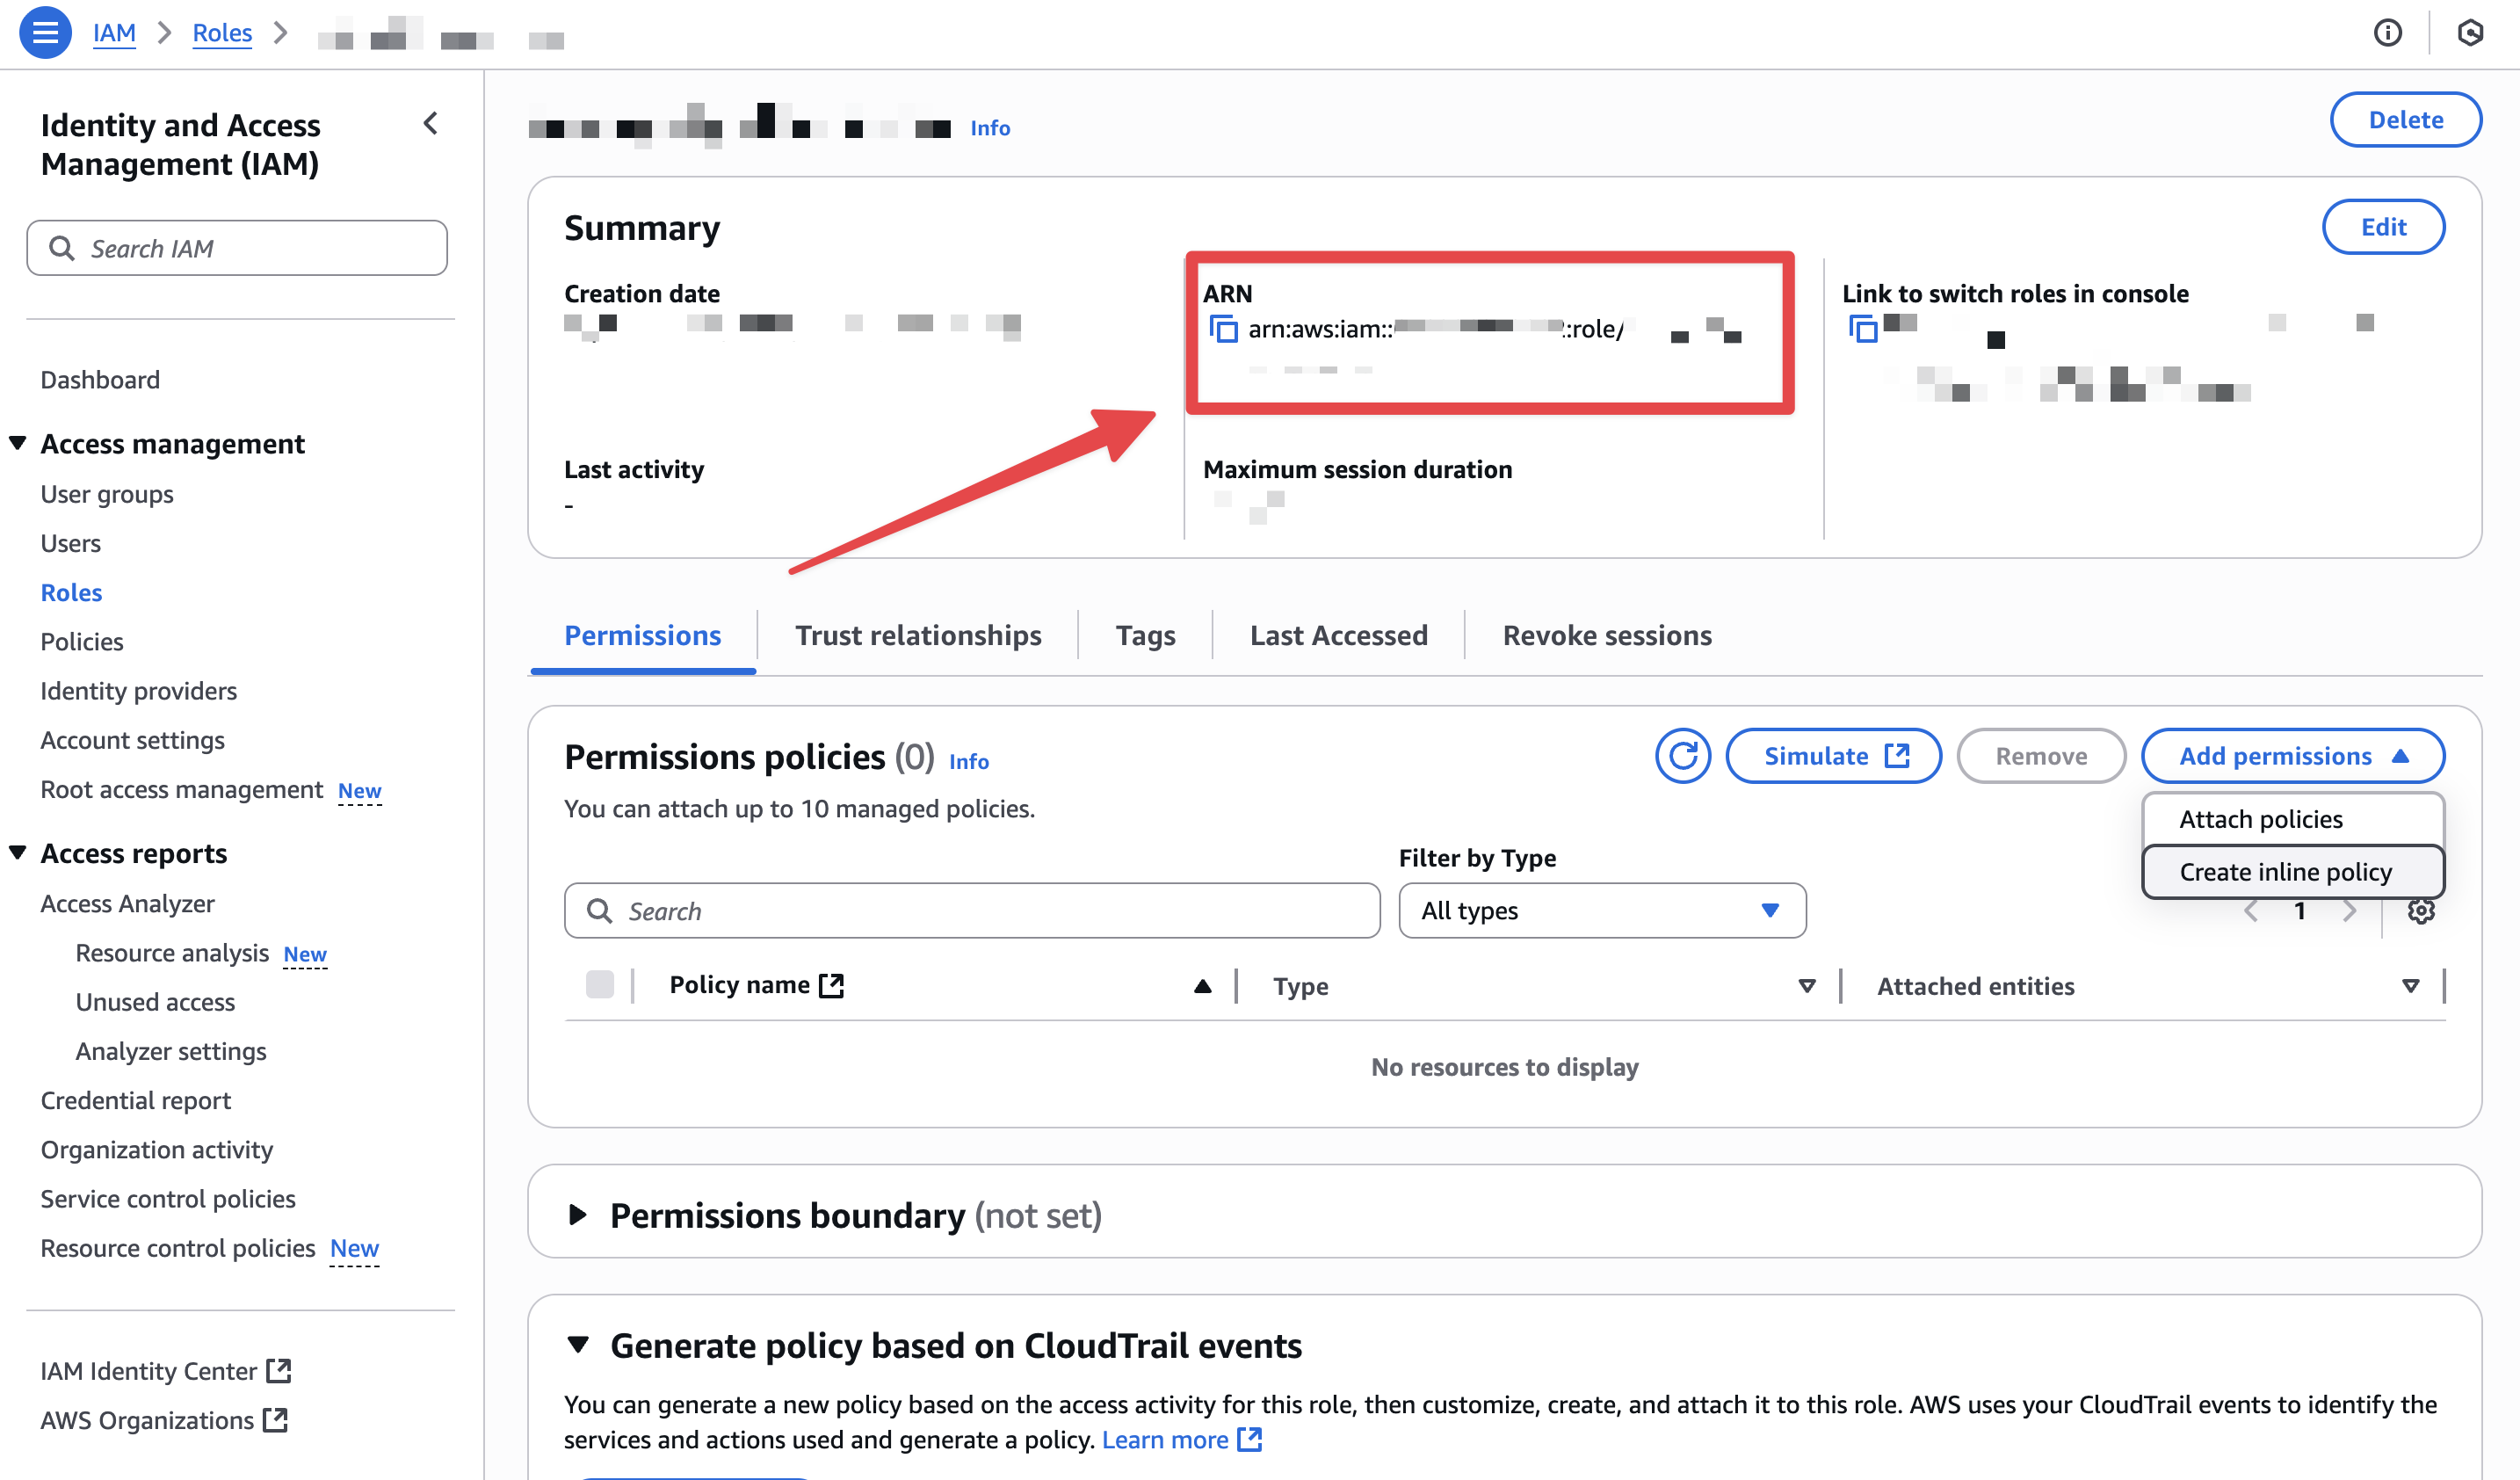
6
Authenticate in Enkryptify
- Paste the Role ARN into Enkryptify to complete authentication.
- Select the AWS region you want to sync secrets to.
7
Connect to an Amplify app
- Select the Amplify app you want to sync.
8
Map Enkryptify environment to Amplify branch
- Example:
main→productionordevelop→staging. - Or choose ‘All branches’ for app-level variables.